Cole hildebrandt
Photography Blog
|
After the first week of class, I thought the whole class would be easy. However, I found that I was still pushed and challenged in areas that I already had knowledge. Coming into the class, I already had photography knowledge and much Photoshop experience. Luckily, though, I still had a really fun time, and learned many new things that I can add to my arsenal of tools and abilities. Overall, it was a great class and it helped me practice the skills I already had and develop new skills and combinations of abilities.
During the class, I found that I really enjoy photographing people and objects up close. Capturing peoples' emotions, especially within their eyes, has quickly become my favorite type of photography. I also enjoy macro shots because you can see details that aren't usually seen by the human eye. In terms of photoshop, I enhanced my editing skills by learning how to use curves to edit photos, effectively change the atmosphere and feeling with the School Context assignment, and learning how to composite two photos for a cool exposure effect for the Photoshop Tutorials assignment.
School Context Assignment.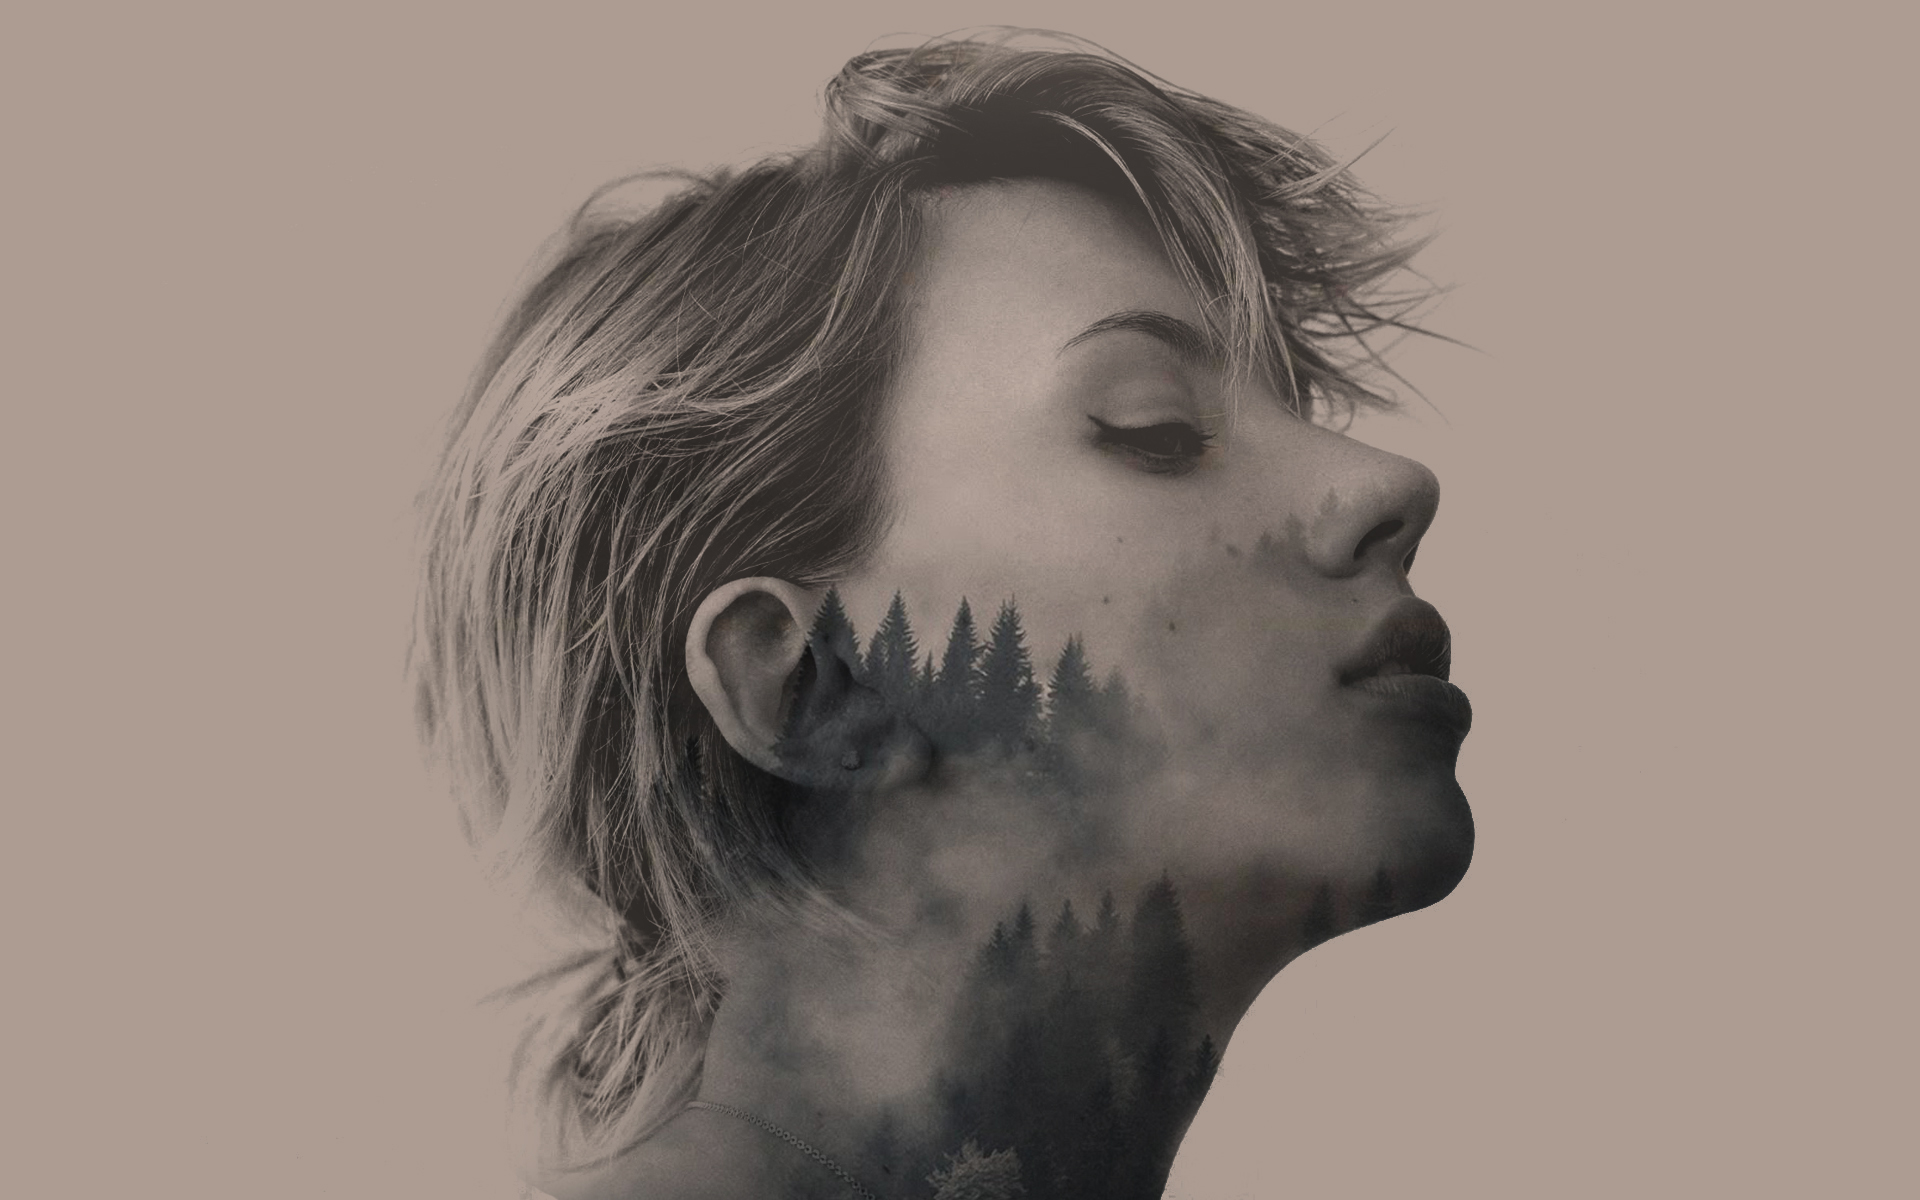 Photoshop tutorials assignment, using photo compositing and exposure effect.
0 Comments
This was a cool and unique project that we did, and it was one of the Photoshop projects I enjoyed the most. The goal was to take multiple pictures, then composite them using automatic stacking and alignment, and layer masks. By doing so, you can make it appear like the same person is in the photo multiple times, thus the name "Multiple Me."  Through this project, I was able to utilize several skills we had learned previously. I used layer masking, as I had done with previous Photoshop assignments. A tripod was used just like during the panorama project. Finally, I also edited the picture using curves to change the look and feeling. I'd definitely like to do a project of this category again, outside of class.
During this assignment, we explored many new possibilities of photo compositing and editing. We searched up tutorials from the web to add effects to photos that we hadn't done before. Also, it was a lot of fun. Color Pop
Glitch EffectBefore: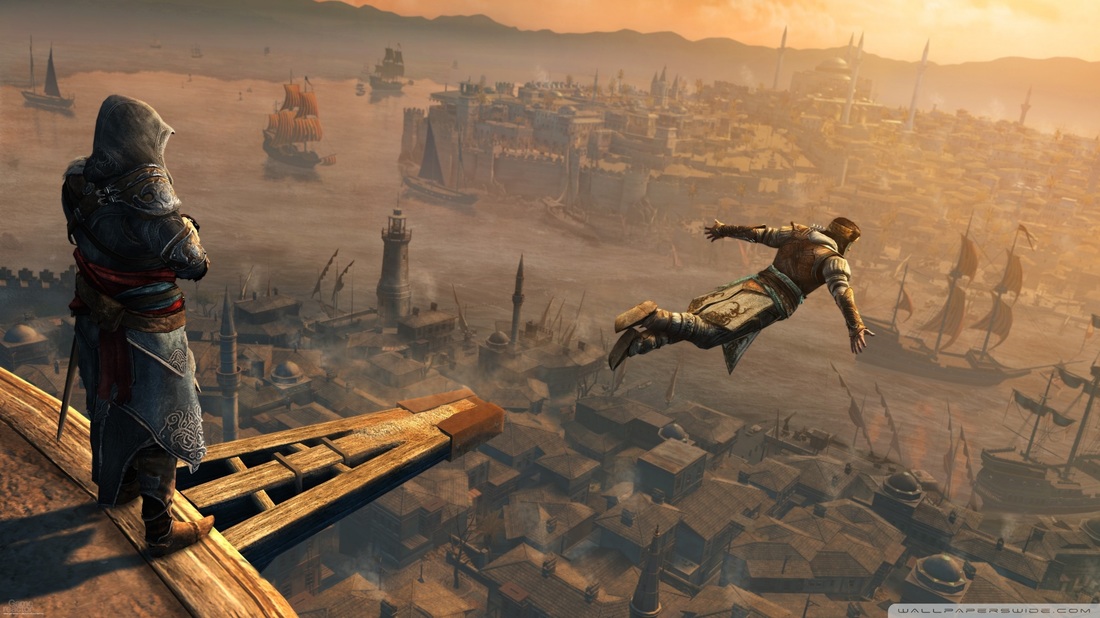 After: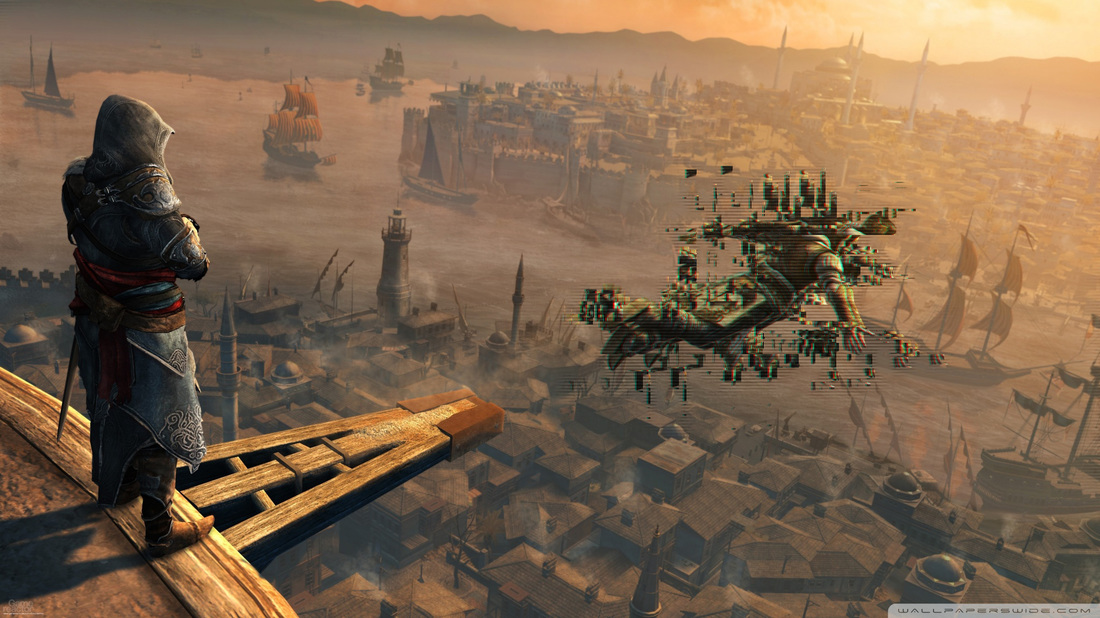 Link: www.youtube.com/watch?v=MaDXuSpN7lkDouble Exposure EffectBefore: After: Link: www.youtube.com/watch?v=Mbf-QXCCXgMOverall, I learned a lot of new techniques and tools during this project. I learned how to select images in a different way that retained hair strands and such, as well as compositing photos using different blending modes. This was a great project with lots of freedom involved, which I really appreciated, so I can't wait to apply this to my work.
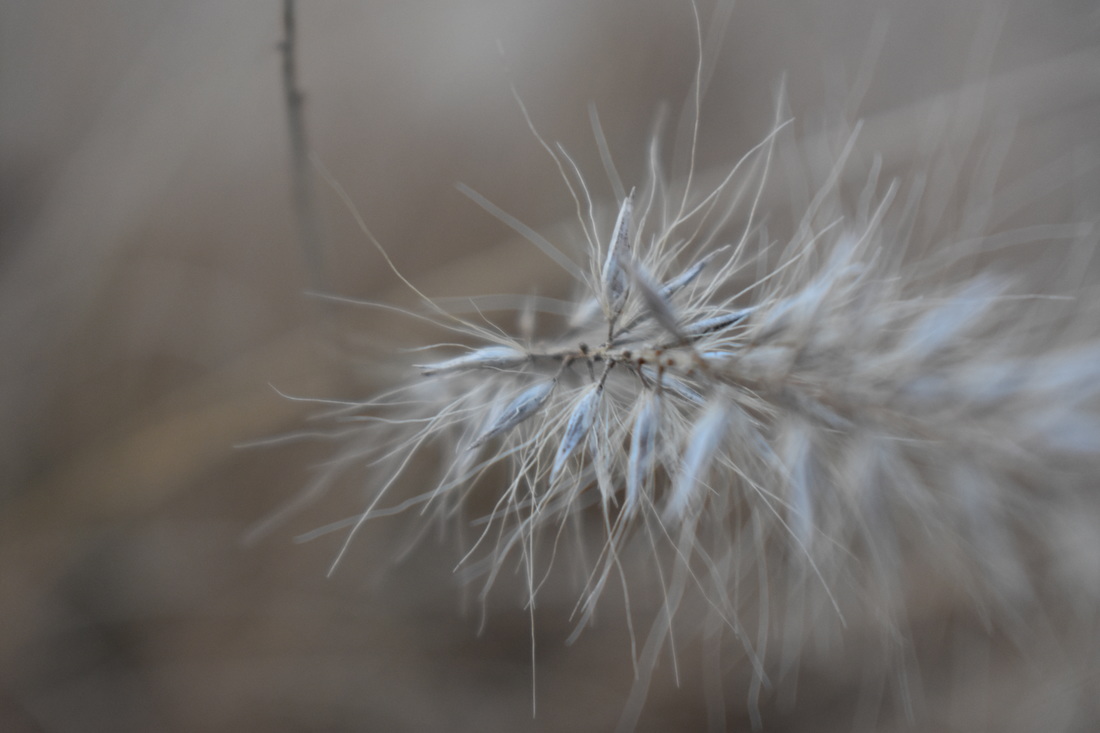
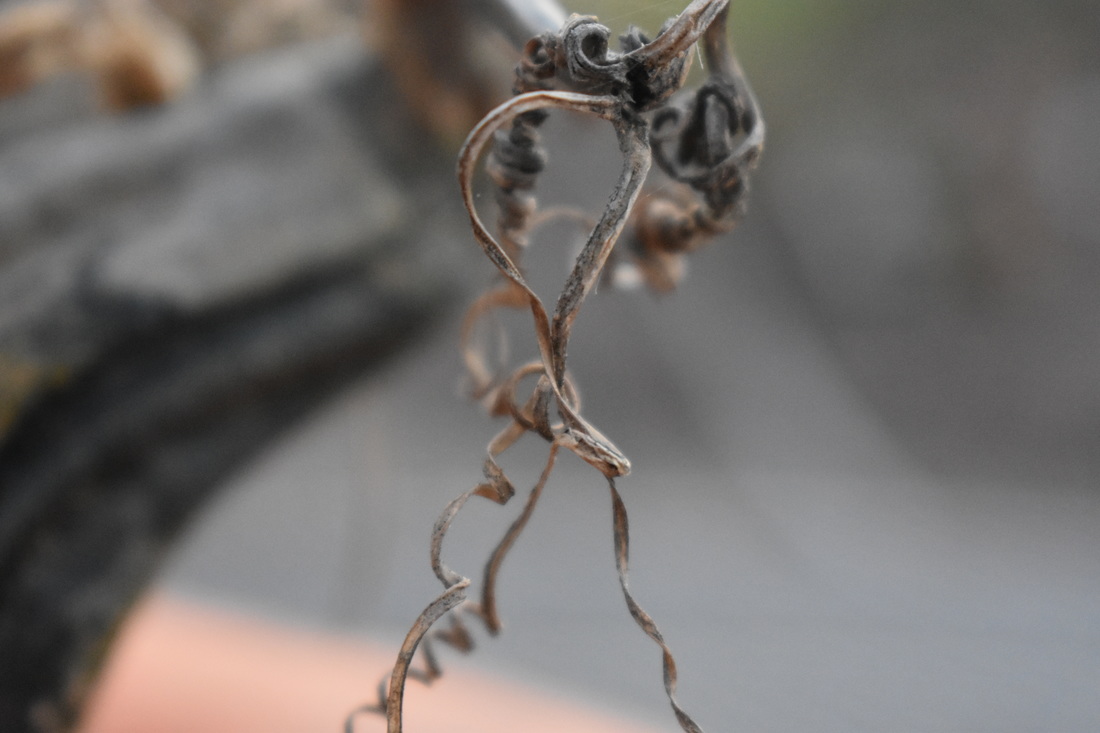
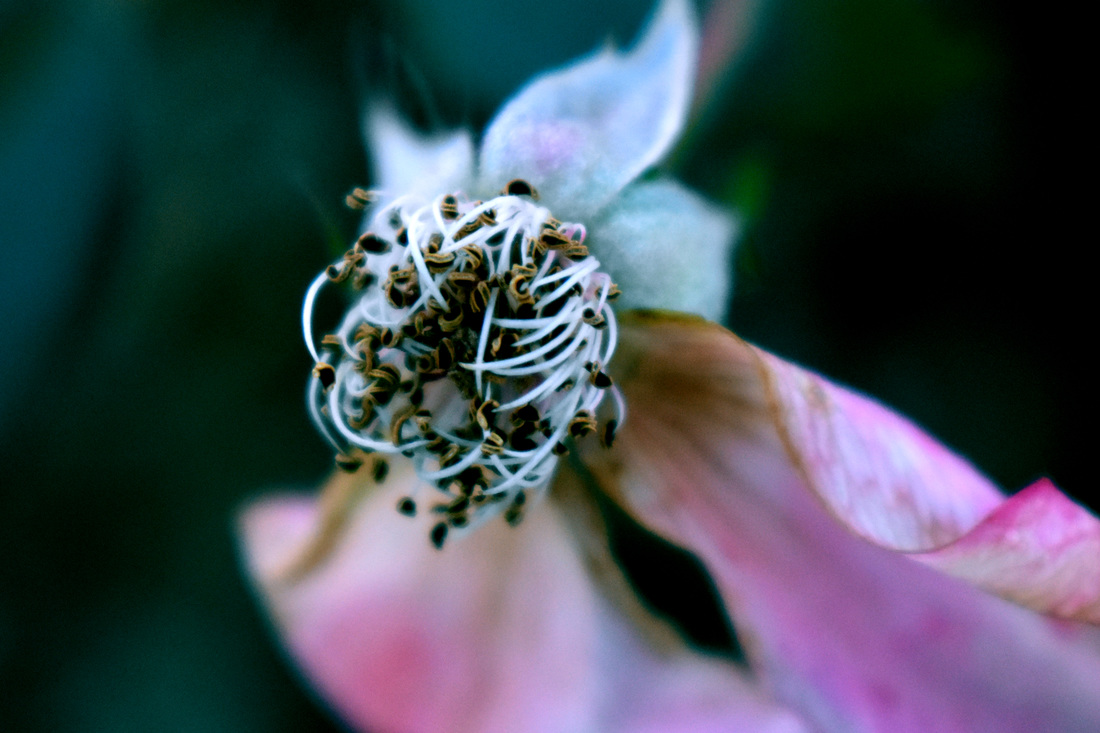
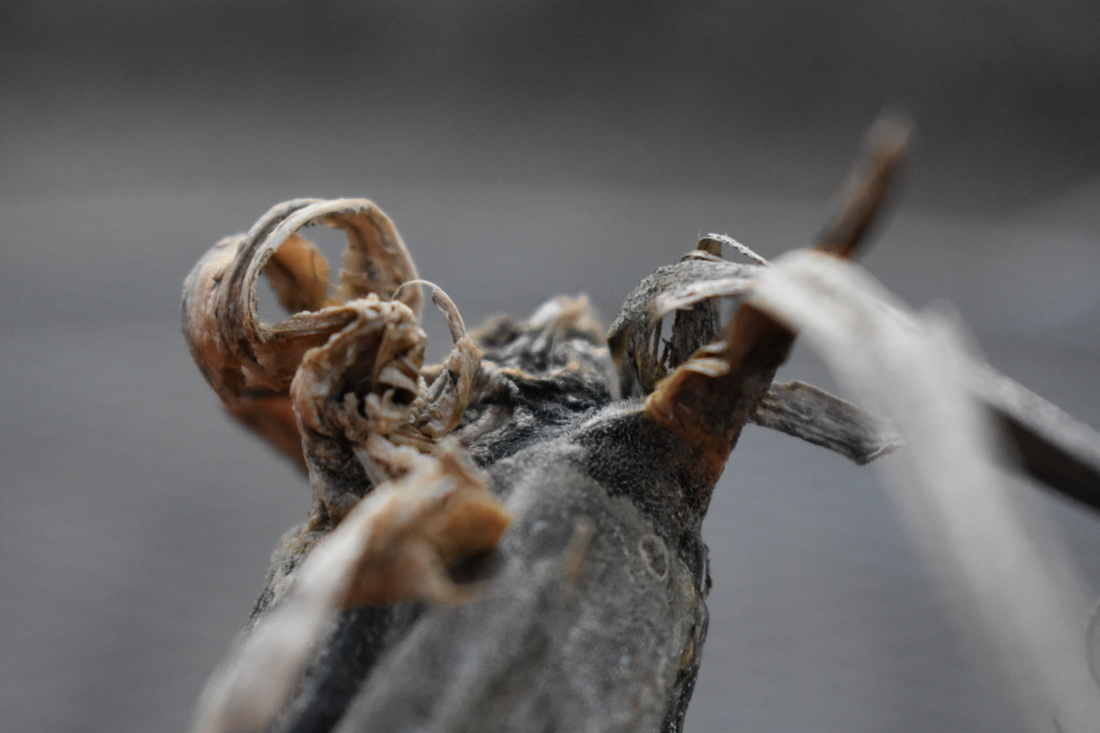
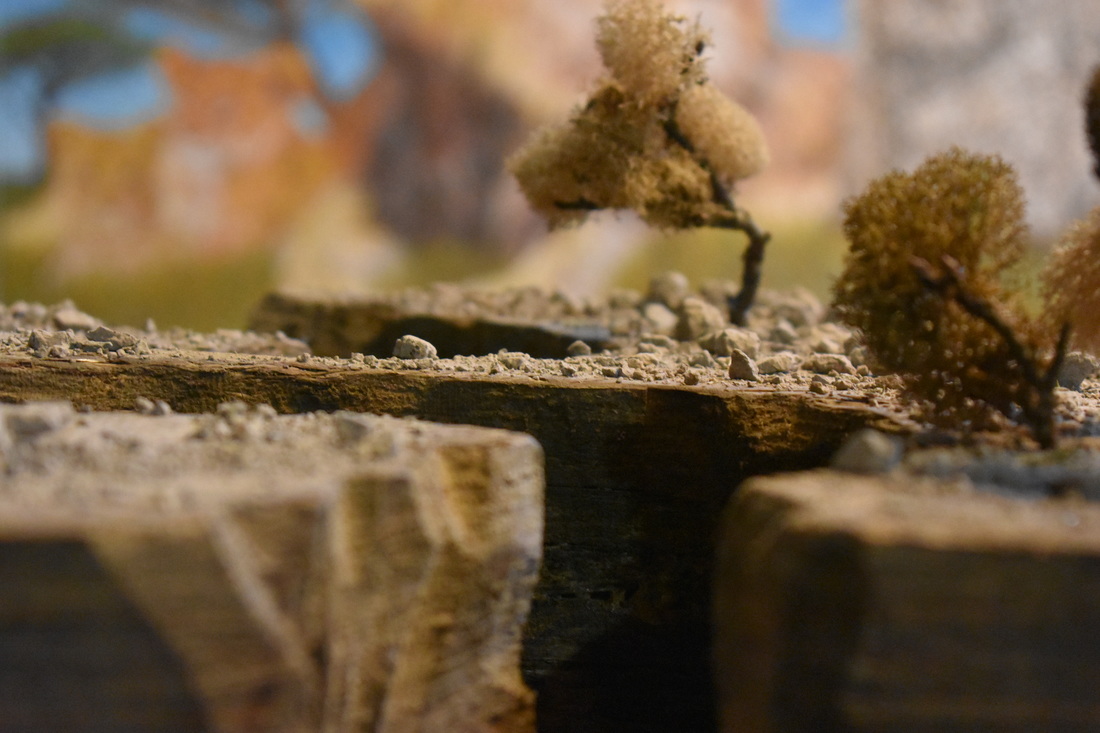
For my final photo project, I decided to go with Macro, and capture the intricacies that often aren't seen by the human eye. I had a lot of fun with this assignment because I didn't know that I could get in as close as I did with my camera. I did editing with curves, which I am finding out I really enjoy using, and some cropping to center the subject. You can how close I was able to zoom in by looking at the specks of fluffy cotton-like strands on the upper right side of the photo. Unedited: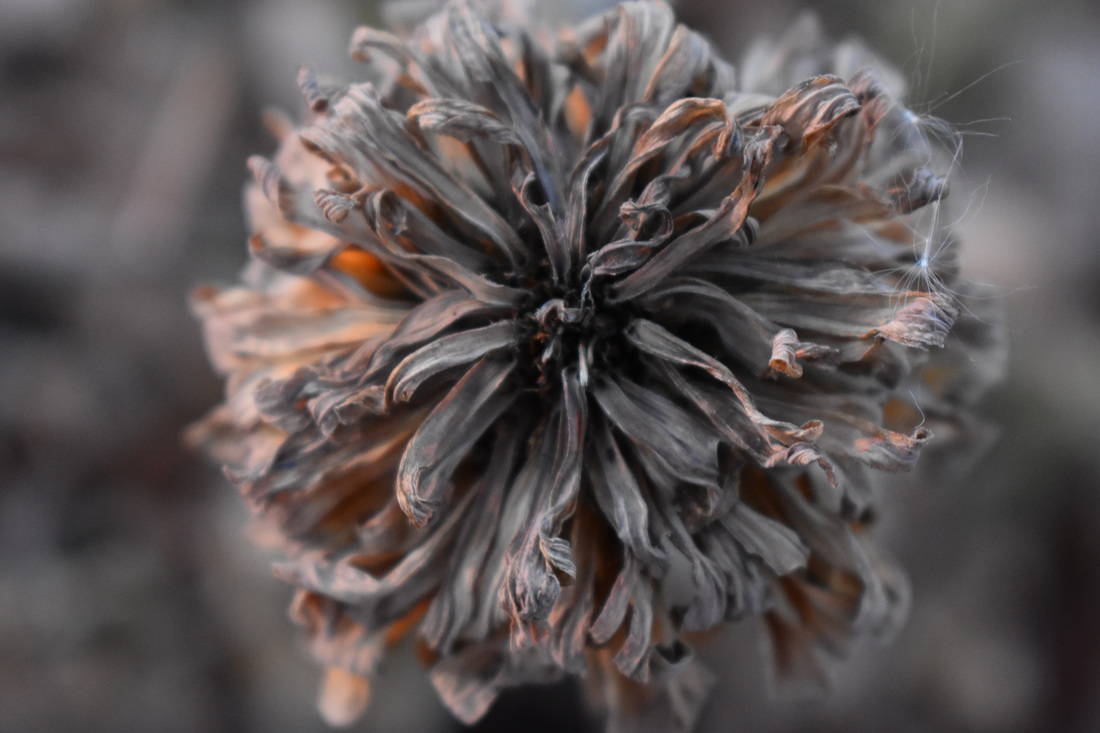 Edited: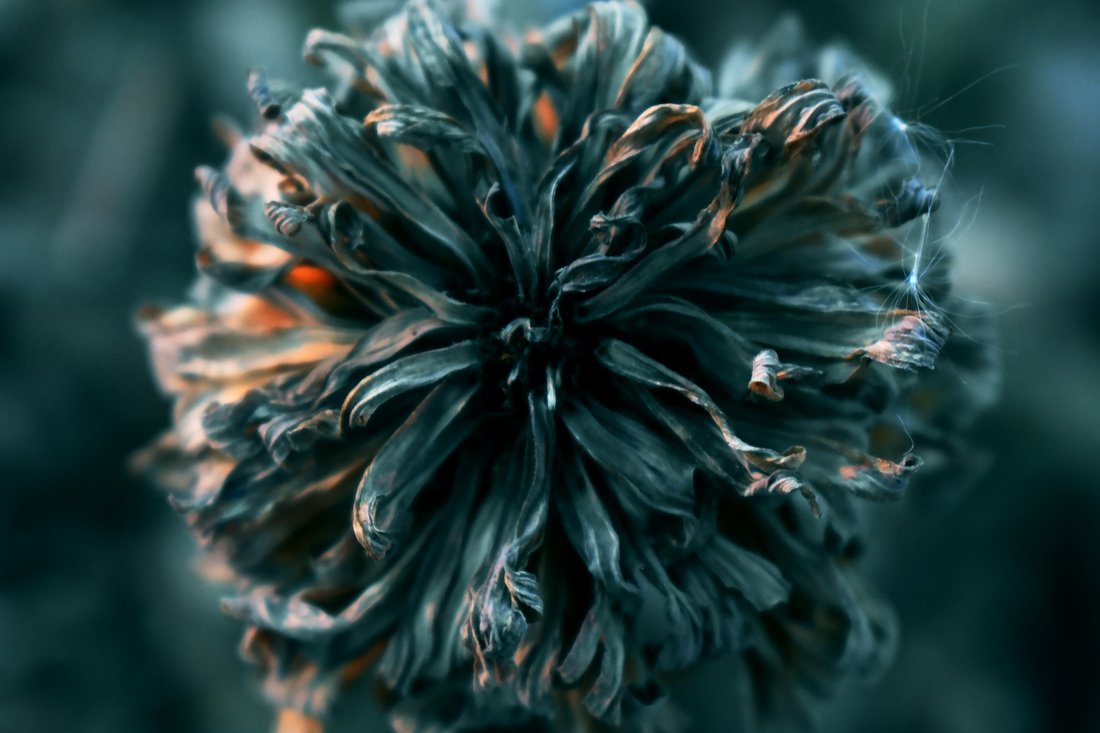
This was a great assignment to end our photo assignments with. I really enjoy macro shots and have been taking them ever since I first began taking photos on my first iPhone. I learned that I was able to zoom in much closer than I imagined with my camera. All in all, I've enjoyed the photography assignments during this class and they've greatly improved my knowledge of taking photos.
For this assignment, we broadened our spectrum of tools and capabilities in Photoshop. Our goal was to take a picture from the school grounds and change its context. What that means is that we had to add in different backgrounds, characters, and subject matter to change the context, or location, or the school. Before: 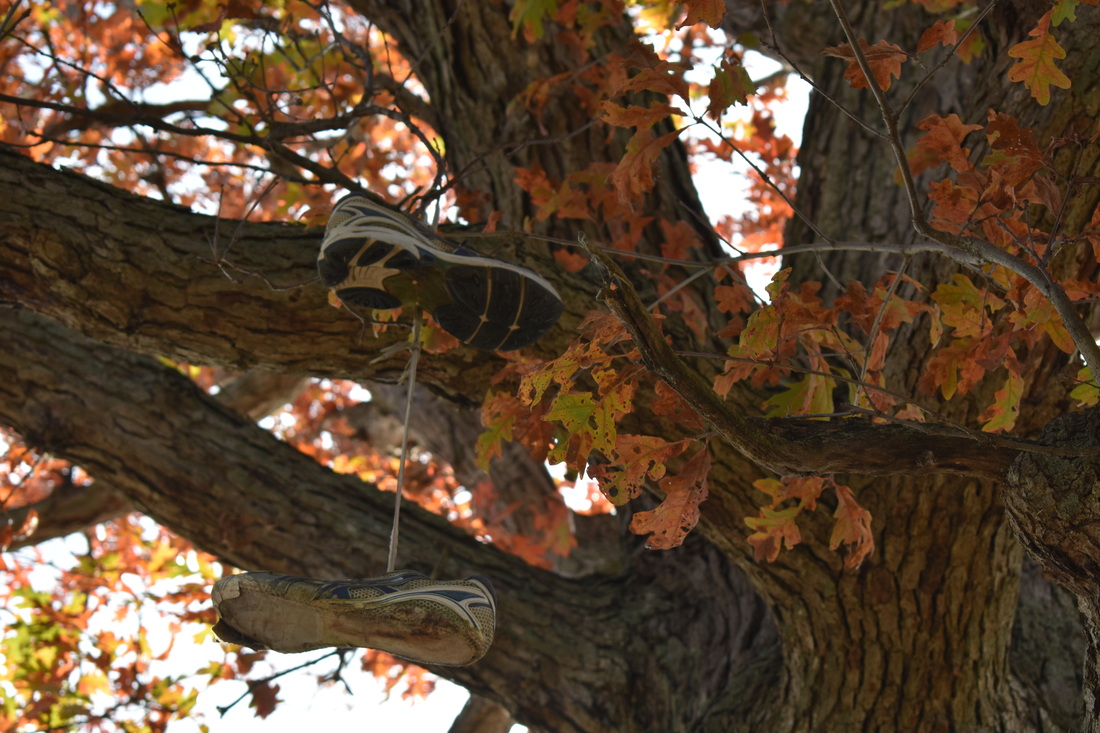 After: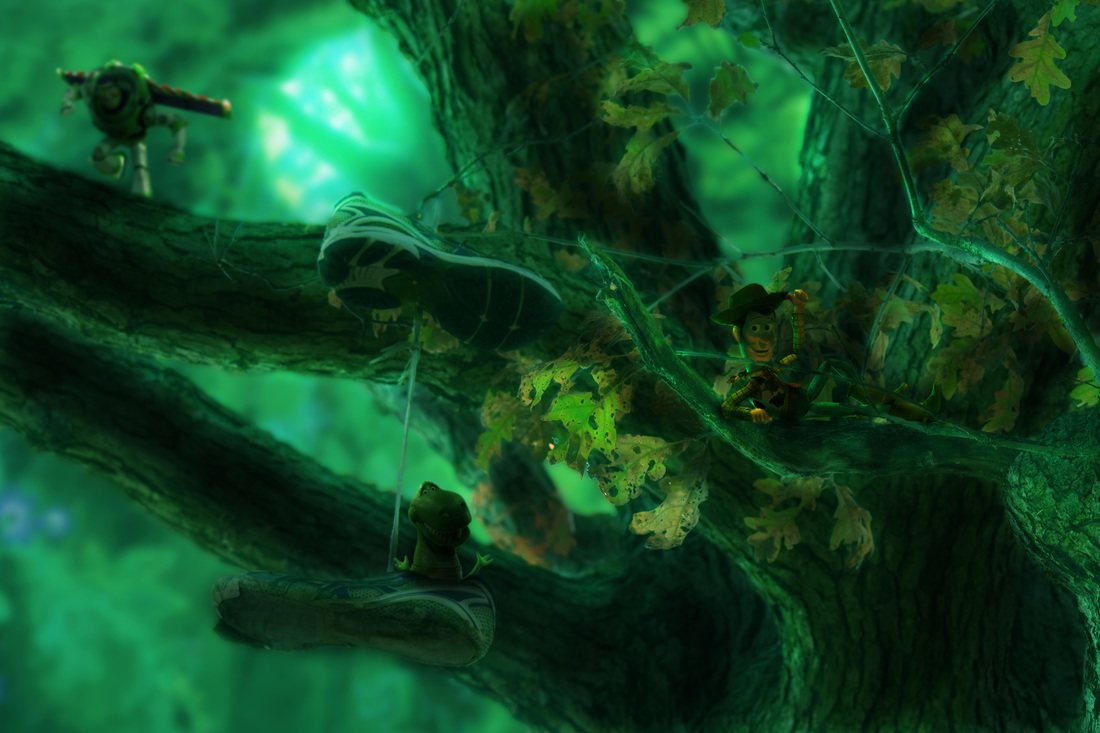 What I learned during this assignment was how to incorporate images together to create a believable scene. I think I achieved that because the final image turned out really good and ended up looking like the characters were really there. I used many tools to accomplish this, including the selection tool, blur tool, dodge tool, magic wand, brush tool, burn tool, and duplicating layers. In terms of image adjustments, I edited the contrast, brightness, and color balance of the image to make it more green so it made sense with my background choice. All in all, I really enjoyed this project.
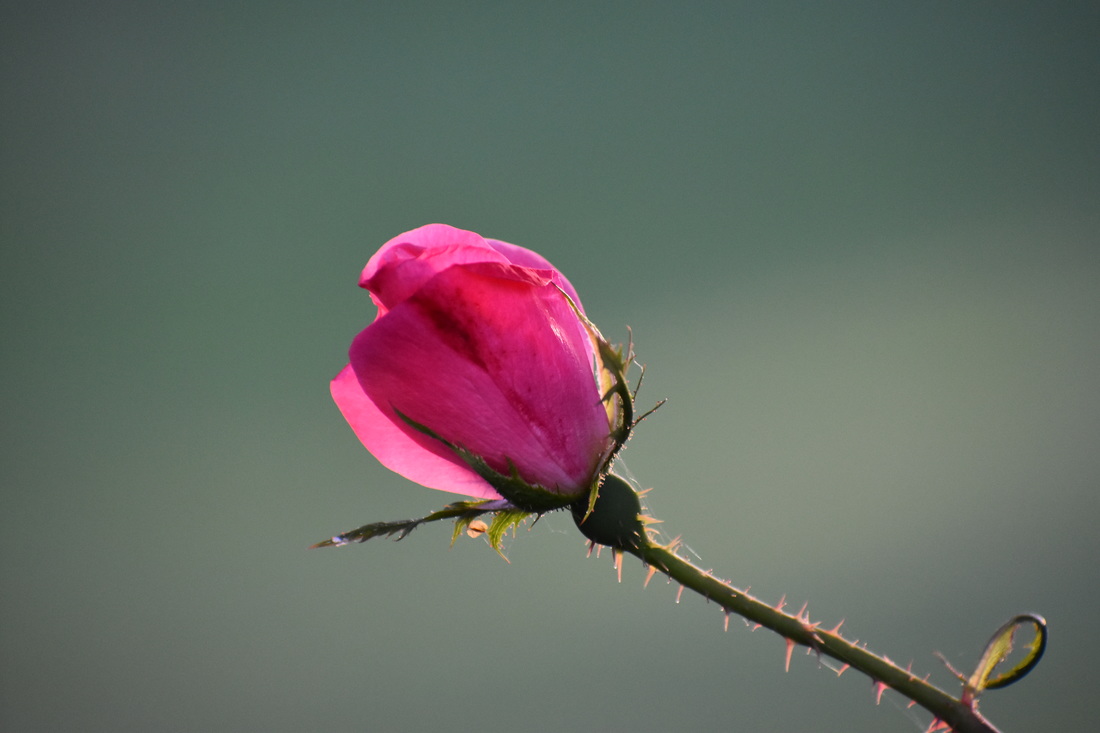
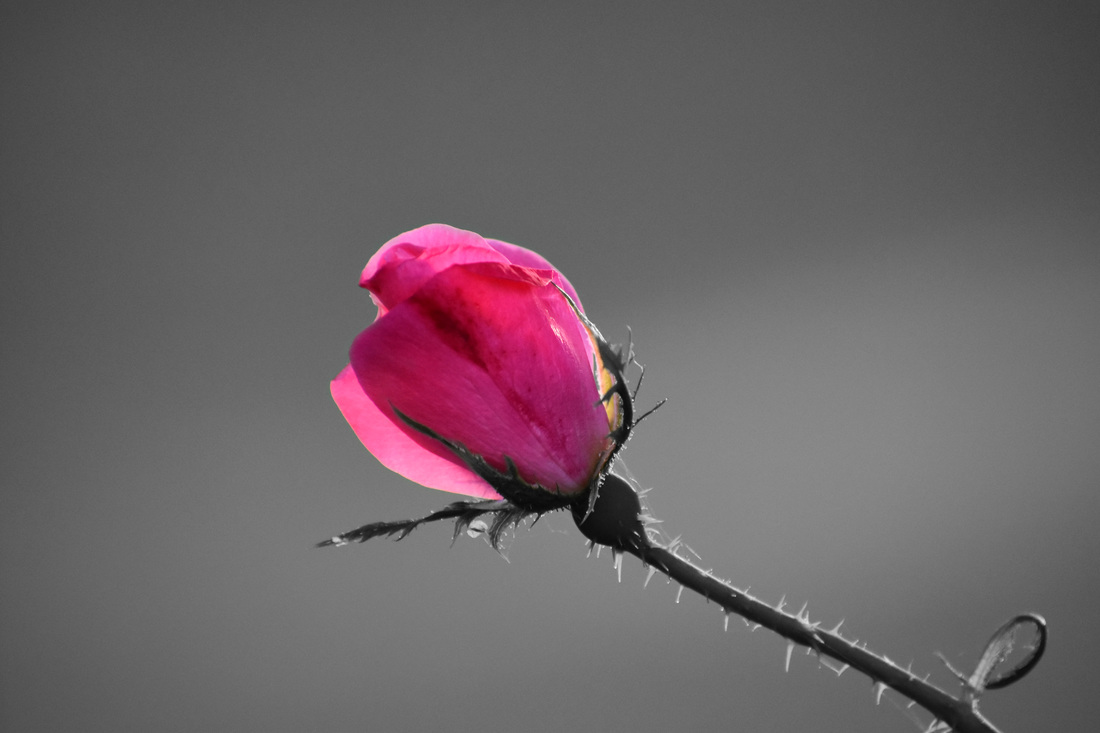
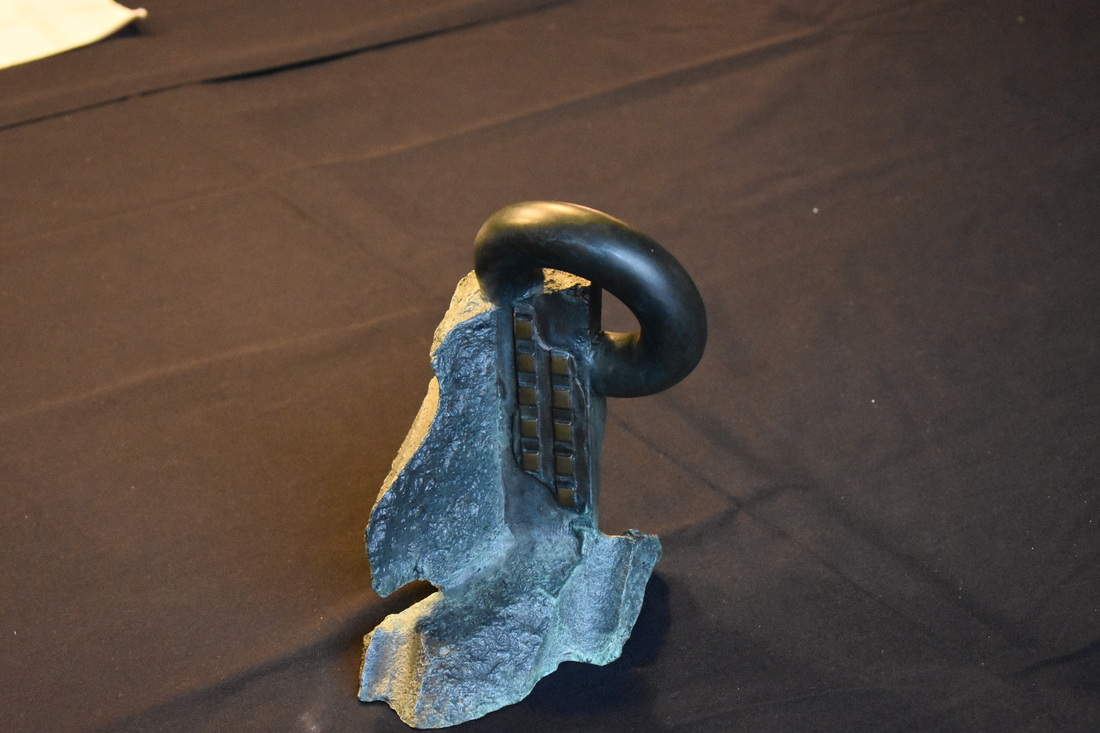
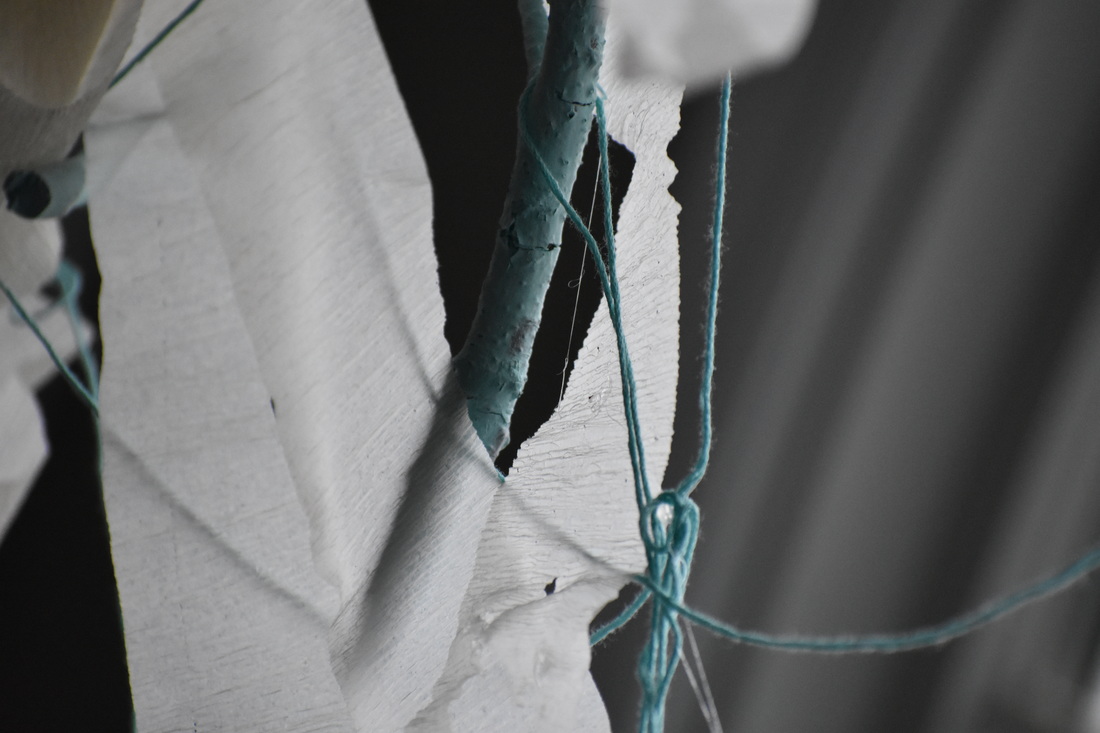
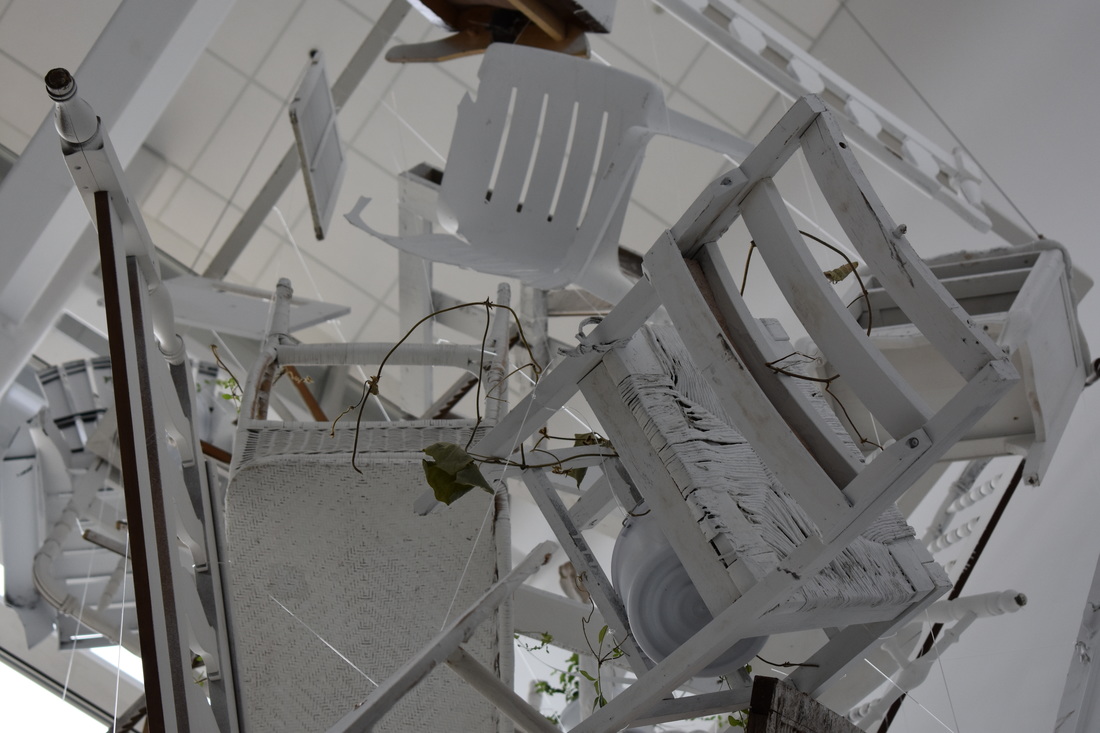
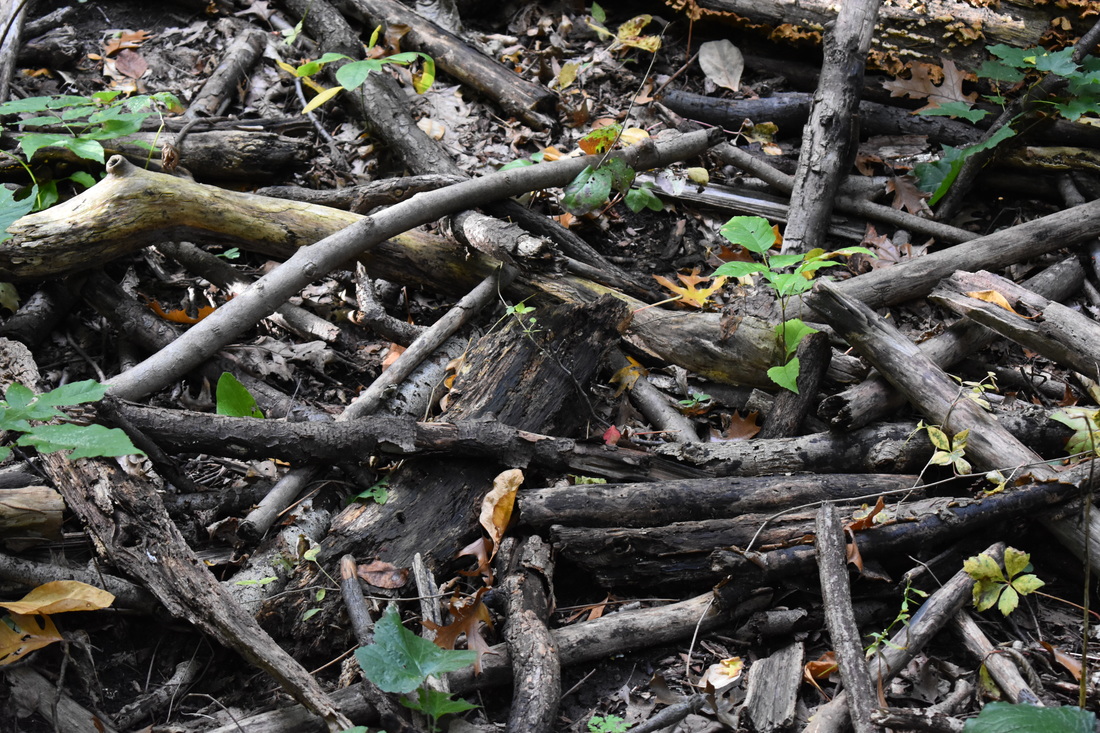
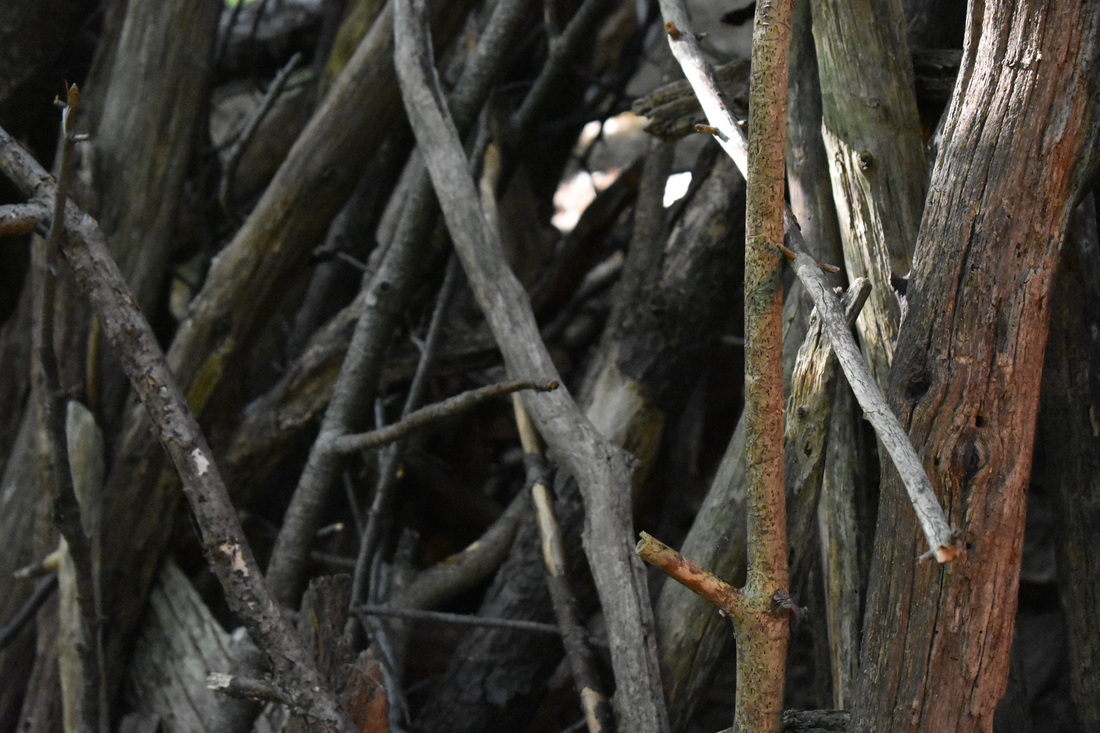
The goal of taking a still life photo was to take a photo of an arranged subject. For this, I though three-dimensional artwork would be perfect. I took pictures of some awesome installations from unconventional viewing angles to capture some intriguing pictures. I edited the final photo using curves to increase the blues and greens while maintain a mostly neutral white light coming in from the window in order to give it a dreary mood. I also cropped the photo to decrease the busyness. Original: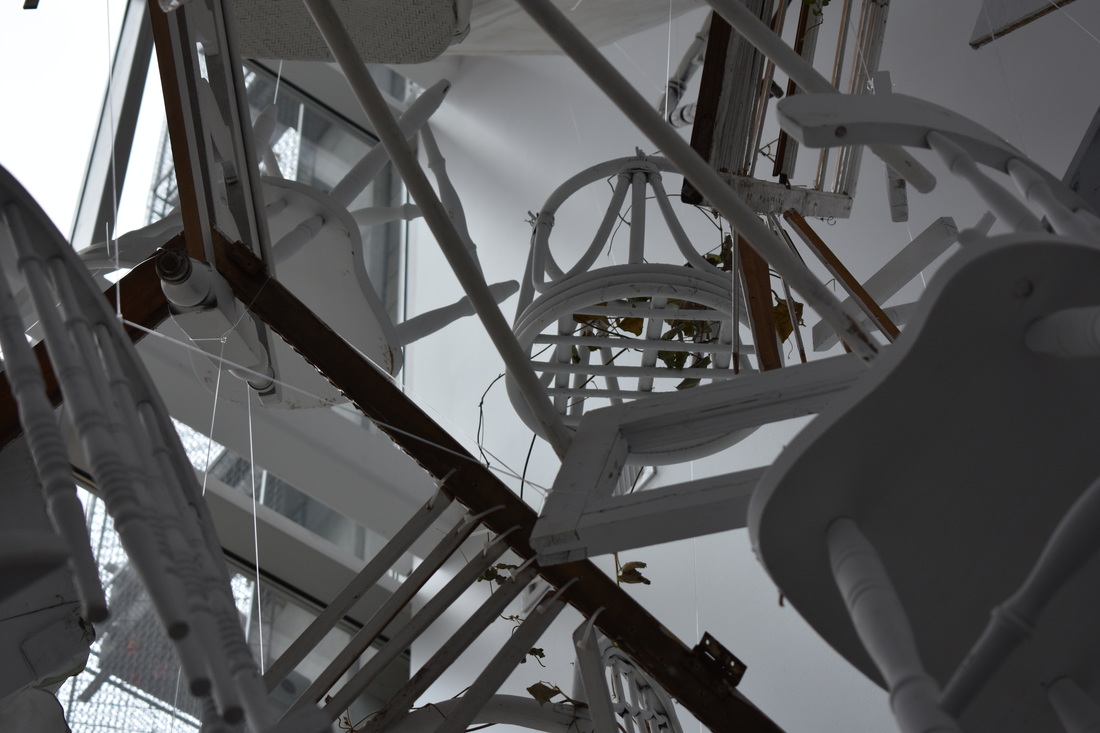 Edited: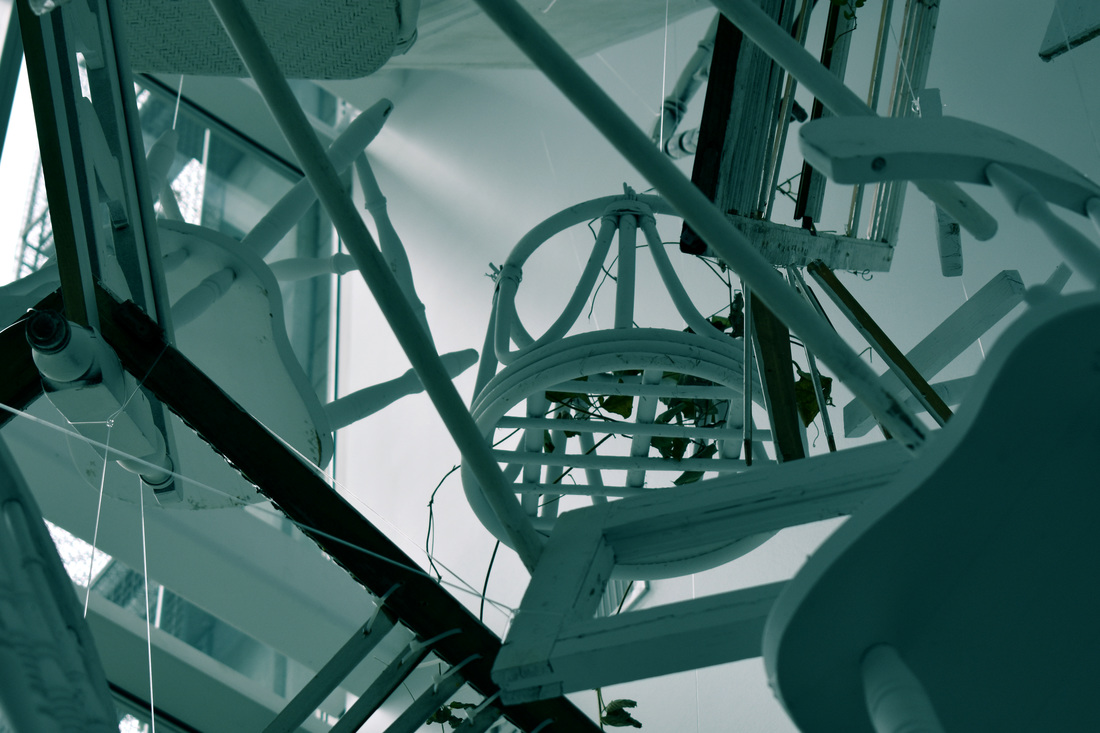
I really enjoyed this week's assignment because I enjoy artwork as well as photography. What I discovered this week was that I have an aptitude for taking great photos when using natural light, and that light is overcast. I think overcast natural light is the best because it doesn't allow for over saturation or over exposure, and can contribute to great organic contrast in photography. While my final photo might seem busy, I think that enhances the photo with all of the intersecting lines and shadows. I believe that this week's assignment went very well and I took a lot of great photos.
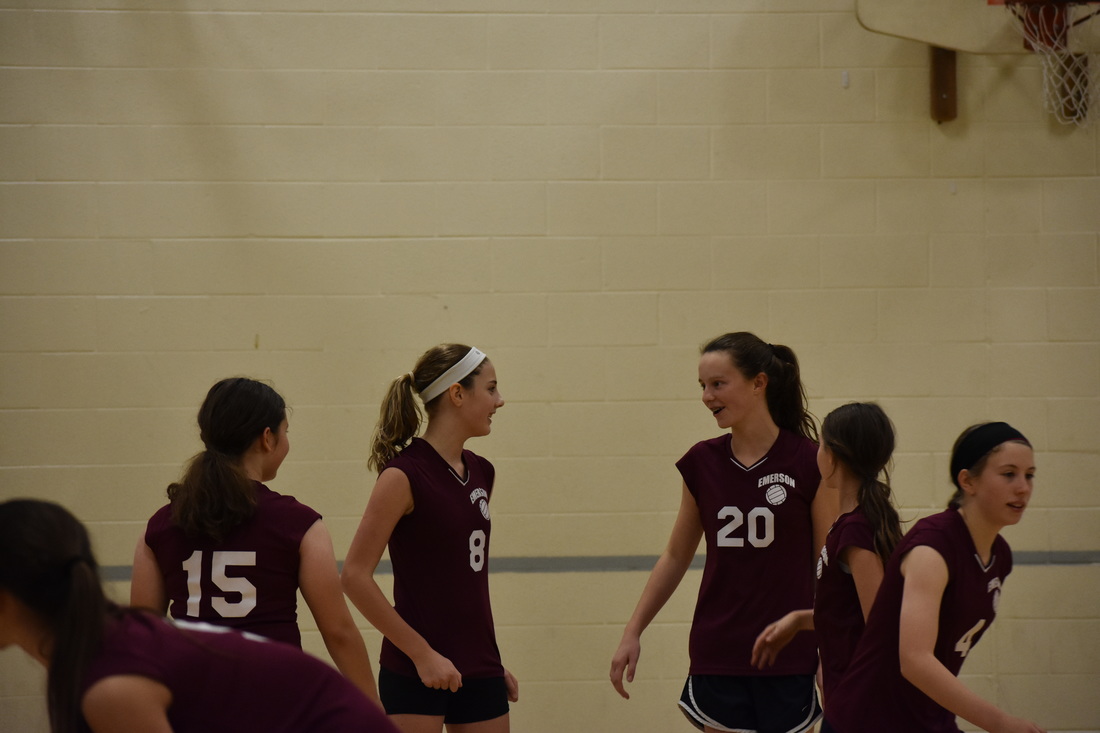
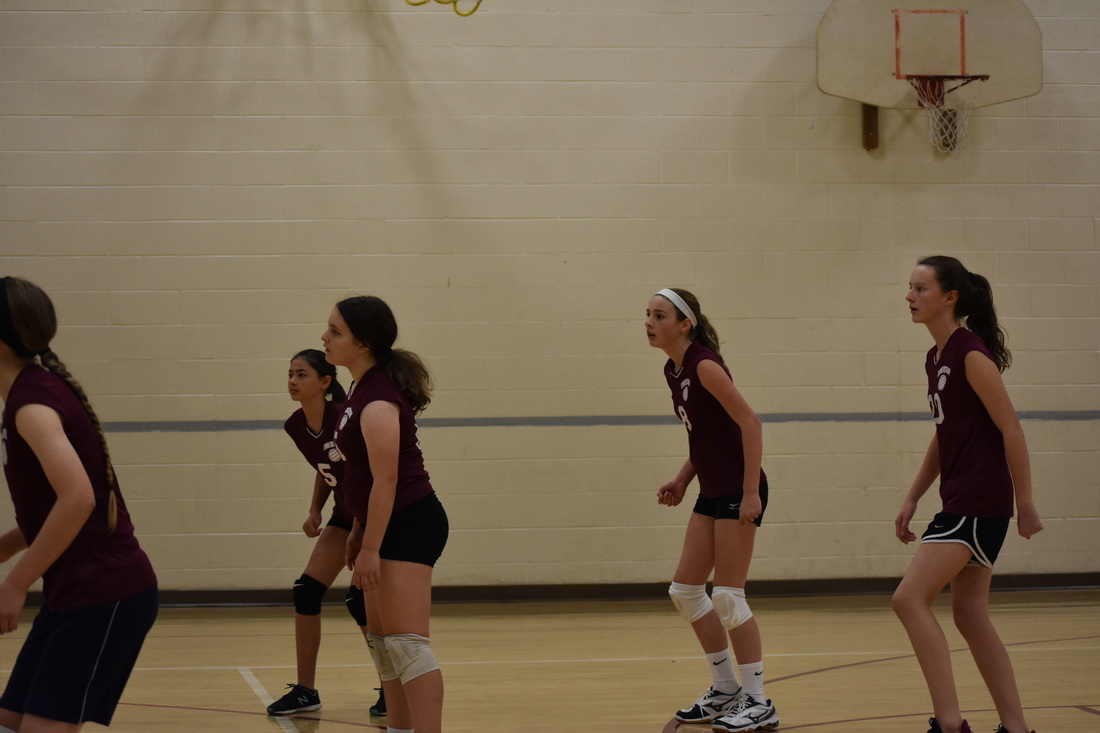
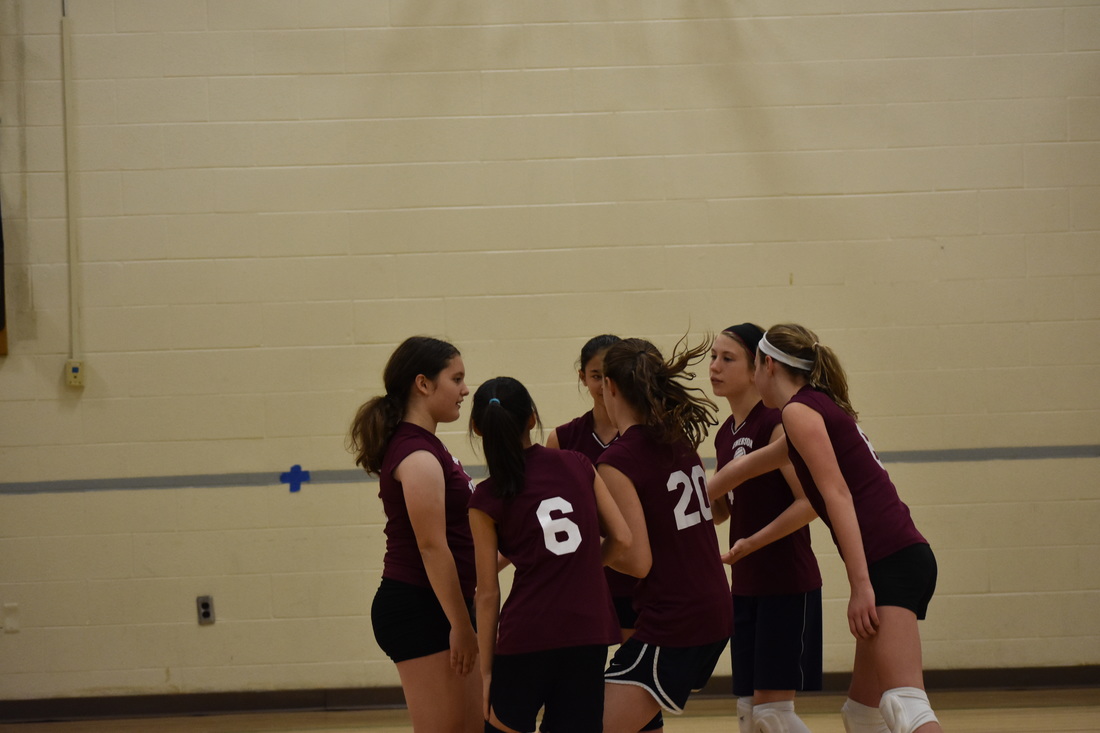
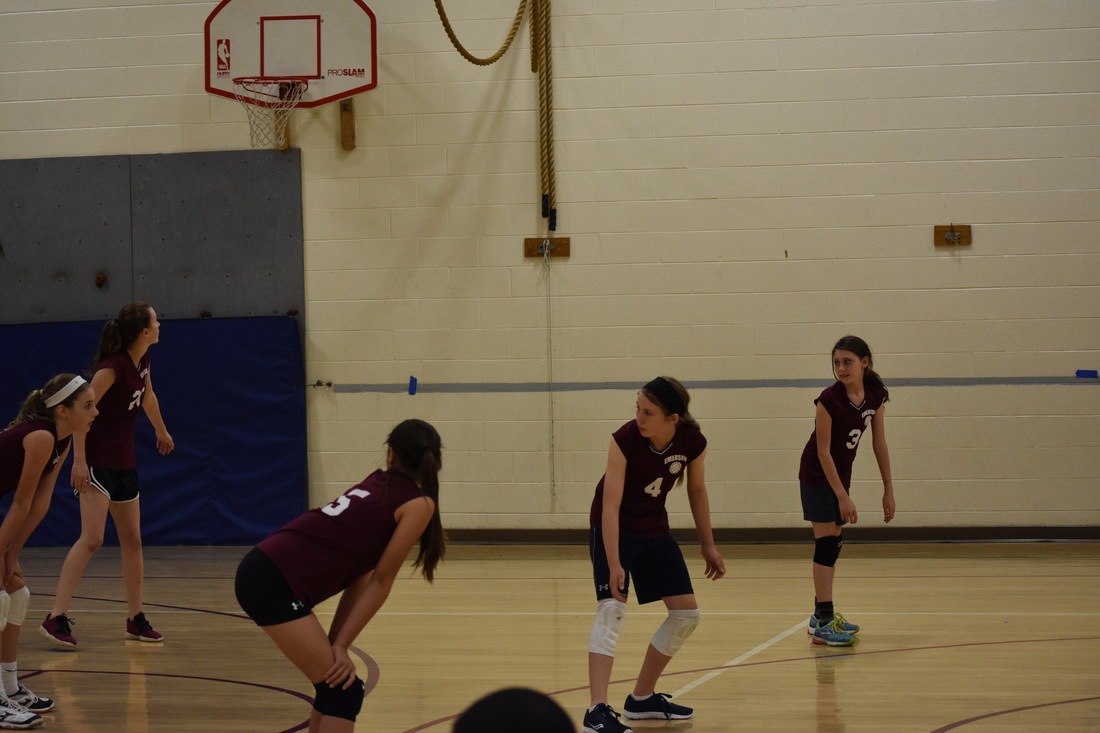
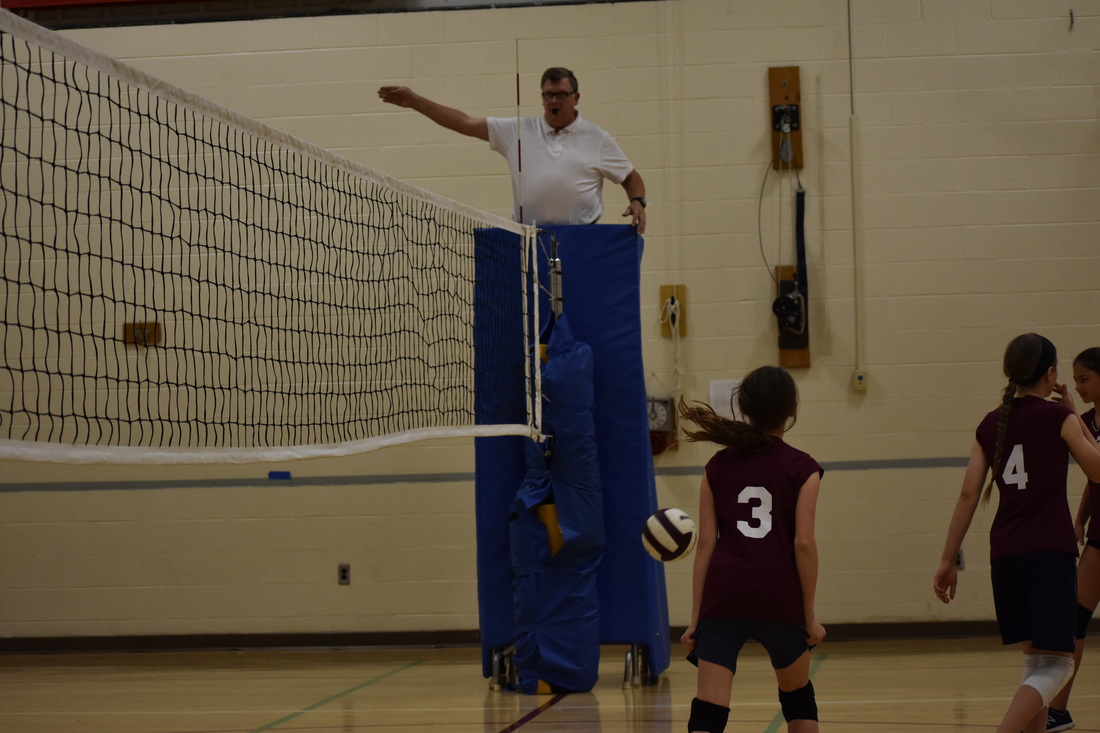
For this week's assignment, I chose to cover an event. I was able to attend my sister's volleyball game and it was fun to take pictures of her and her teammates. Unfortunately, the lighting wasn't as bright as I had hoped, so it was pretty difficult to take any good action shots, as that required a fast shutter speed. Luckily, my best photo's lighting turned out better than most of the others. In terms of editing, My increasing knowledge of Photoshop allowed me to use the clone stamp to get rid of some distractions in the background. I also cropped it a bit and boosted the contrast, but reduced the amount of yellow. Original: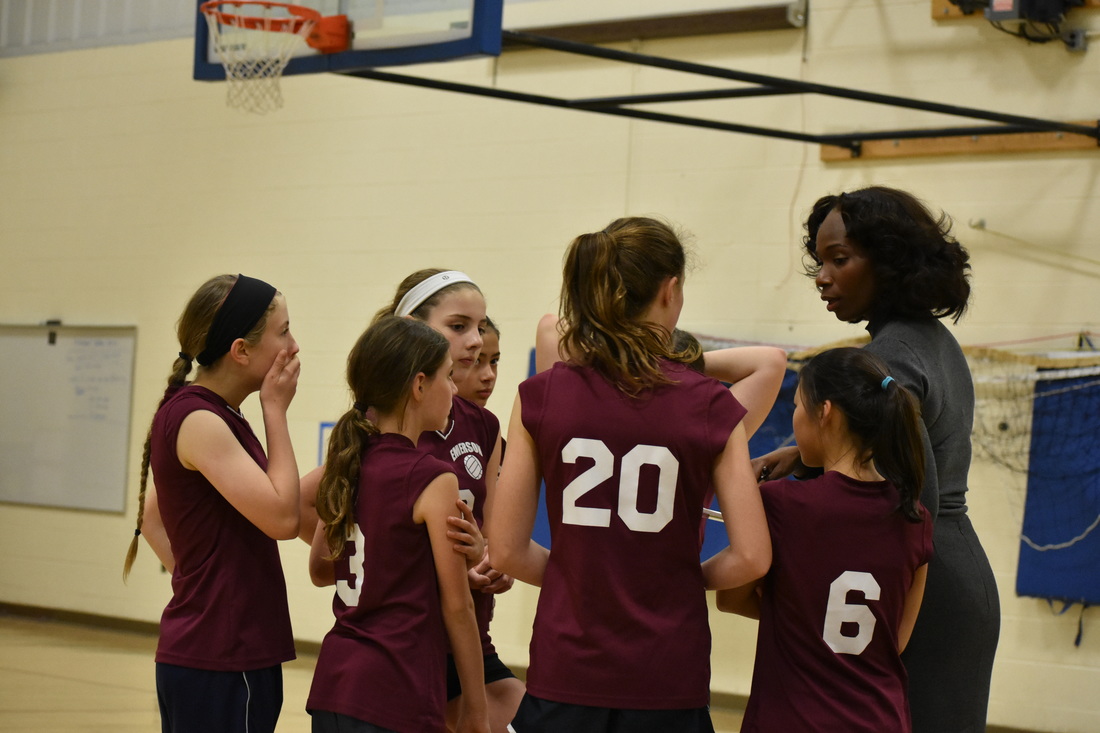 Edited: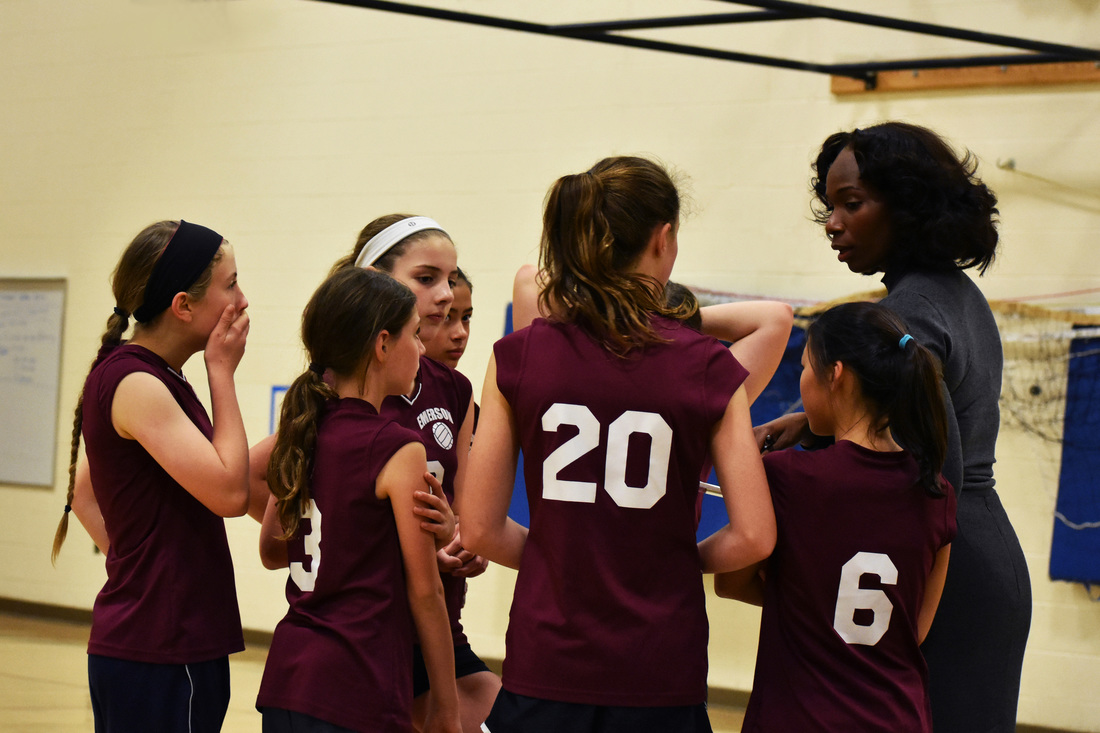
This week's assignment had mixed results. While I wished I could've gotten better action shots, luckily the pictures where the kids were moving less turned out better. I think my final one turned out the best because it had the best lighting, and it showed a nice huddle of them strategizing as a team, which is what team sports is all about. Hopefully I can work on getting better action shots in the future if the lighting is better.
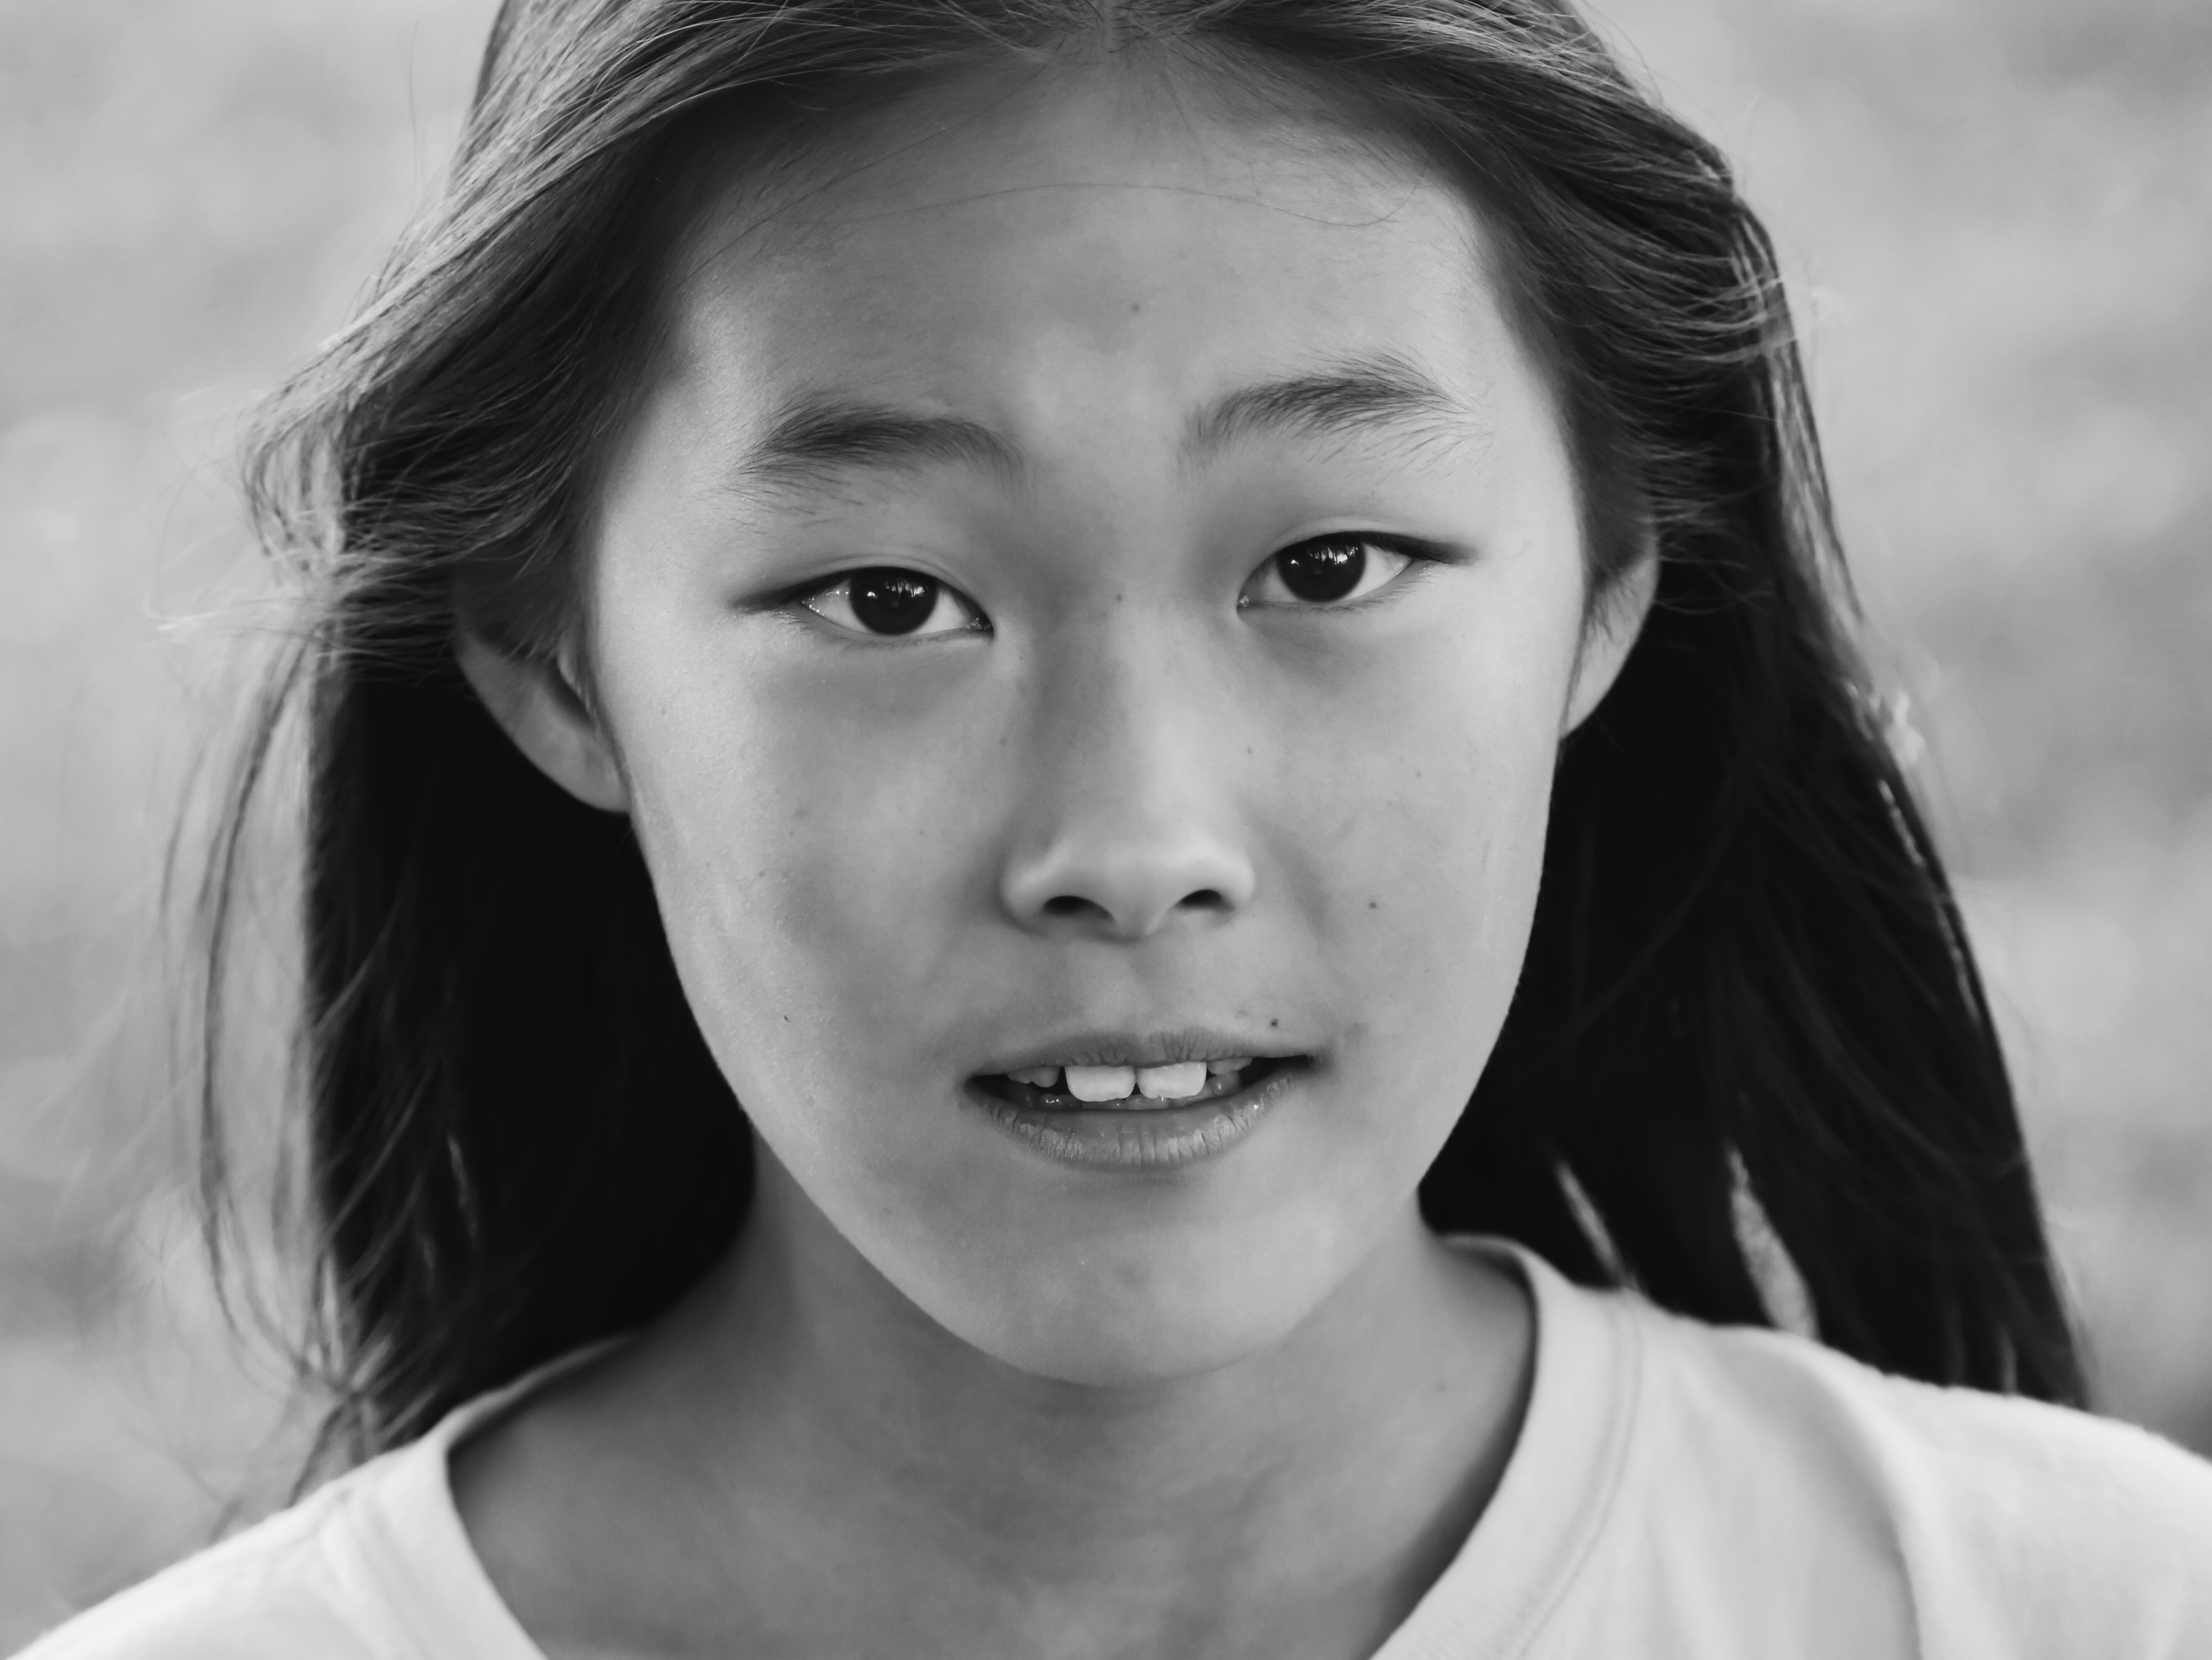
In this assignment, the goal was to take a portrait using three-point lighting in a studio, and using natural light with a bounce light. After taking photos, and choosing a best photo for each, I edited them in Photoshop. Among usual exposure edits, we scaled down each image, and framed them next to each other on a black background.
Final Framing: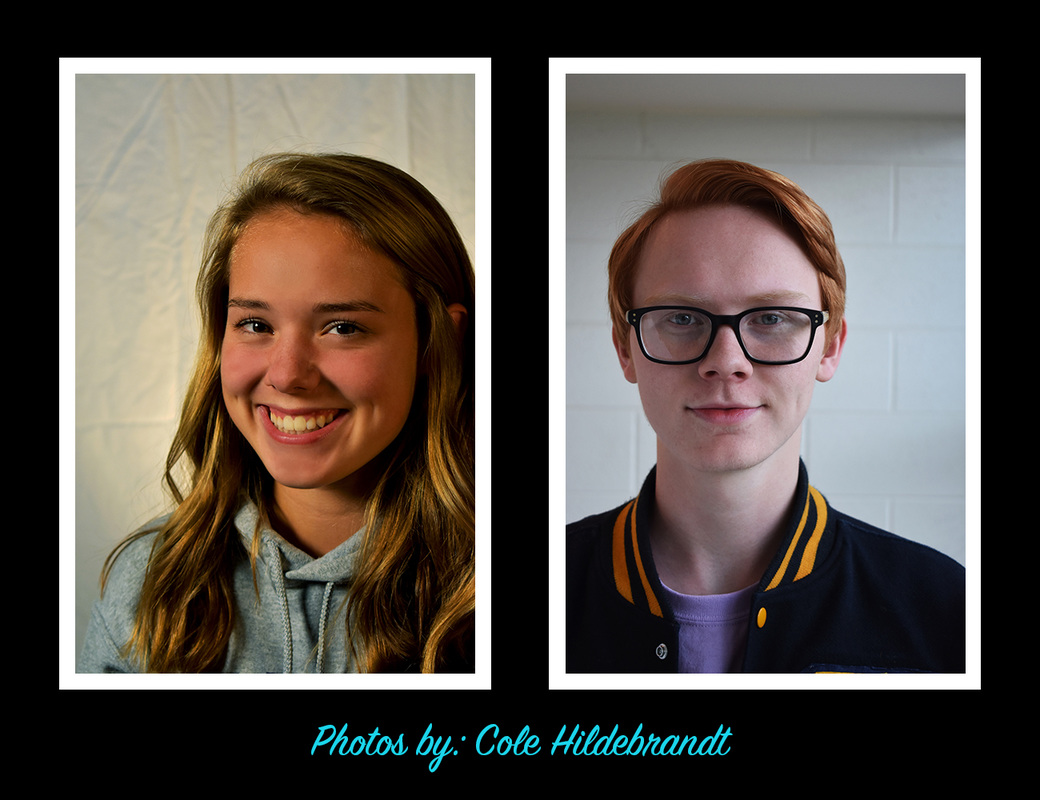 In this project, I learned how to position lighting, natural and synthetic, in order to create a successful portrait. We learned how to use a bounce light outside of the studio and how to position lights in a studio. After photographing people, we learned how to edit the photos in photoshop and frame them. We framed them in white on a black background and then added text at the bottom. Overall, this was a great project, and I think the photos turned out really nicely. I got to learn how to take nice portrait photos and I really enjoyed it.
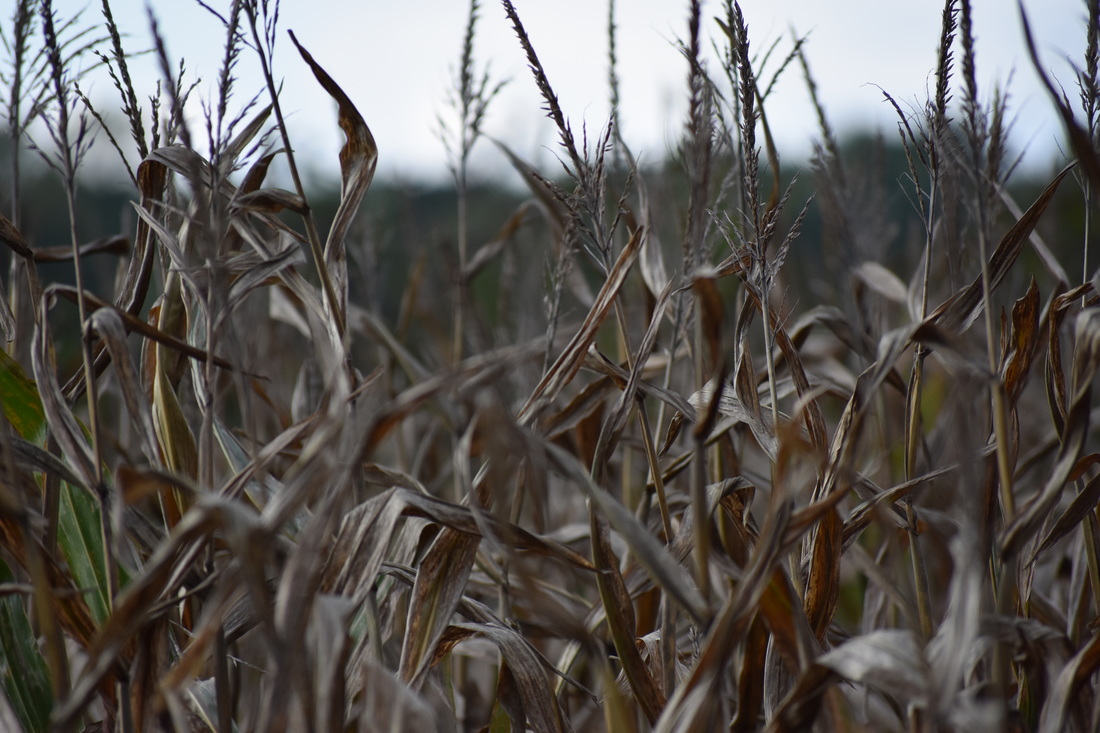
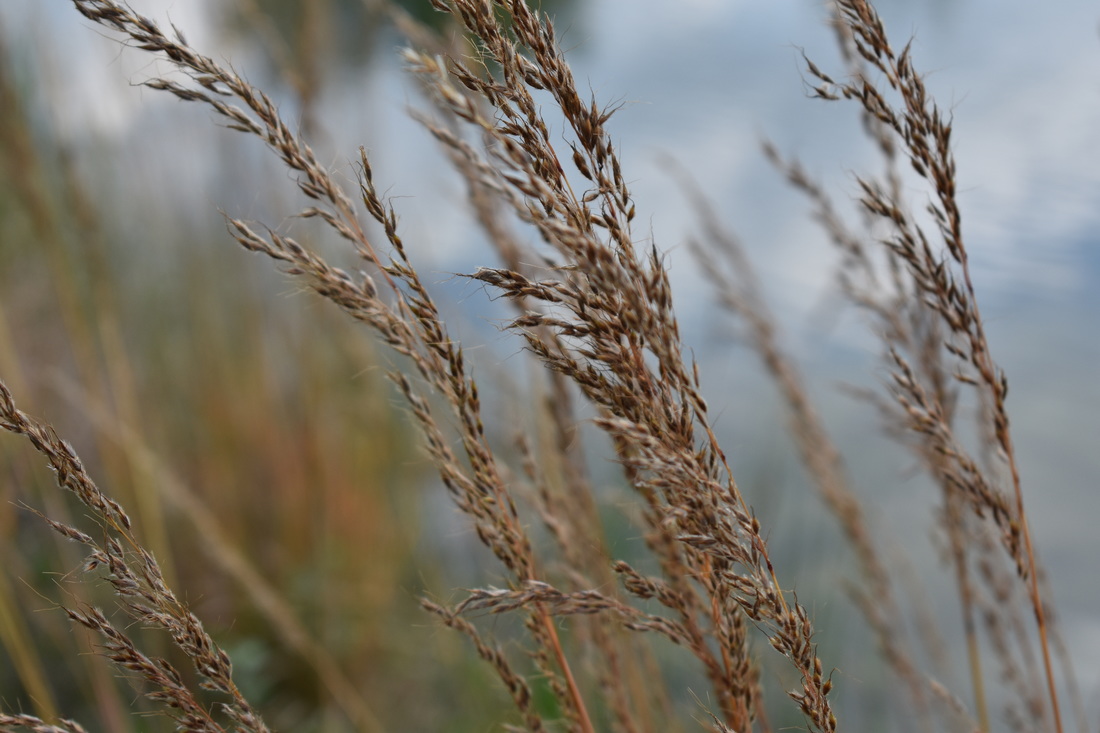
I chose to use nature as the subject for this week's assignment. With all of the changes in the fall, I thought I could get some really interesting photos. The goal was to say something about the nature we live in, and I think I portrayed that well. The dying corn stalks provided some really interesting colors and atmosphere. Original: Edited:
In terms of editing, I boosted the contrast, and used curves to get the look I wanted and the atmosphere I intended.
Overall I enjoyed this project. It was nice to get outside and walk around the nature and take nice pictures. I thought that the photos ended up nicely and I hope to continue growing with my photography skills.
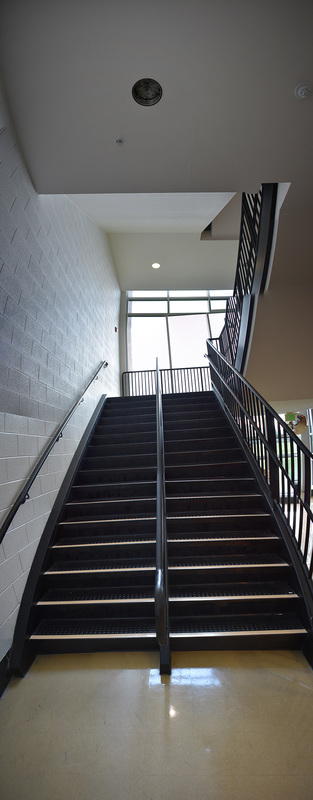
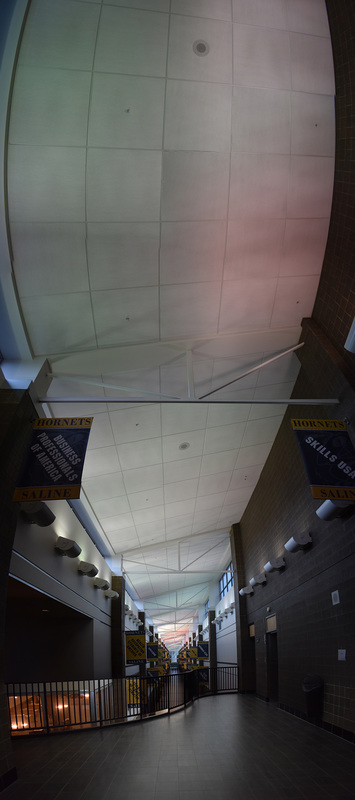
The goal of this assignment was to get experience with panoramic photos. We were able to achieve this goal by taking multiple pictures that overlapped, and then stitched them together in Photoshop to create a panorama. While a tripod would make this assignment very easy, I was able to still be successful without using one. Best Panoramas:  Other Panoramas:
In this assignment, I learned how to stick panoramas together using photoshop. I also learned how to successfully take photos in order to do that. Most of the panoramic pictures turned out great, except for one, which had a bit of disjointed sections. Overall, it was a cool project and good experience for taking panoramas in the future.
|